Difference between revisions of "Transport drones"
From Vendetta Online Wiki
Chocolateer (Talk | contribs) (Added Partial Transport Loadouts) |
Chocolateer (Talk | contribs) (Added remaining transport loadouts) |
||
| Line 27: | Line 27: | ||
|- | |- | ||
| colspan=9 border=0 | '''Systems Located In:''' [[Itan]] | | colspan=9 border=0 | '''Systems Located In:''' [[Itan]] | ||
| + | |} | ||
| + | {|Border=1 class="wikitable" | ||
| + | ! align=center rowspan=2 | [[image:All_ion_blasters.png]] | ||
| + | ! align=center rowspan=2 width=135 | Ion Blaster | ||
| + | ! align=center | | ||
| + | |- | ||
| + | | align=center | | ||
| + | |} | ||
| + | {|Border=1 class="wikitable" | ||
| + | ! align=center rowspan=2 | [[image:Battery_Heavy.png]] | ||
| + | ! align=center rowspan=2 width=135 | Heavy Power Cell | ||
| + | ! align=center | | ||
| + | |- | ||
| + | | align=center | | ||
|} | |} | ||
{{br}} | {{br}} | ||
| Line 61: | Line 75: | ||
|- | |- | ||
| align=center | | | align=center | | ||
| + | |} | ||
| + | {|Border=1 class="wikitable" | ||
| + | ! align=center rowspan=2 | [[image:Battery_Light.png]] | ||
| + | ! align=center rowspan=2 width=135 | Hive Fast Charge | ||
| + | ! align=center | Capacity | ||
| + | ! align=center | Charge Rate | ||
| + | ! align=center | Mass | ||
| + | |- | ||
| + | | align=center | 300 | ||
| + | | align=center | 48/s | ||
| + | | align=center | 110kg | ||
|} | |} | ||
{{br}} | {{br}} | ||
| Line 95: | Line 120: | ||
|- | |- | ||
| align=center | | | align=center | | ||
| + | |} | ||
| + | {|Border=1 class="wikitable" | ||
| + | ! align=center rowspan=2 | [[image:Battery_Light.png]] | ||
| + | ! align=center rowspan=2 width=135 | Hive Fast Charge | ||
| + | ! align=center | Capacity | ||
| + | ! align=center | Charge Rate | ||
| + | ! align=center | Mass | ||
| + | |- | ||
| + | | align=center | 300 | ||
| + | | align=center | 48/s | ||
| + | | align=center | 110kg | ||
|} | |} | ||
{{br}} | {{br}} | ||
| Line 129: | Line 165: | ||
|- | |- | ||
| align=center | | | align=center | | ||
| + | |} | ||
| + | {|Border=1 class="wikitable" | ||
| + | ! align=center rowspan=2 | [[image:Battery_Light.png]] | ||
| + | ! align=center rowspan=2 width=135 | Hive Fast Charge | ||
| + | ! align=center | Capacity | ||
| + | ! align=center | Charge Rate | ||
| + | ! align=center | Mass | ||
| + | |- | ||
| + | | align=center | 300 | ||
| + | | align=center | 48/s | ||
| + | | align=center | 110kg | ||
|} | |} | ||
{{br}} | {{br}} | ||
| Line 163: | Line 210: | ||
|- | |- | ||
| align=center | | | align=center | | ||
| + | |} | ||
| + | {|Border=1 class="wikitable" | ||
| + | ! align=center rowspan=2 | [[image:Battery_Light.png]] | ||
| + | ! align=center rowspan=2 width=135 | Hive Fast Charge | ||
| + | ! align=center | Capacity | ||
| + | ! align=center | Charge Rate | ||
| + | ! align=center | Mass | ||
| + | |- | ||
| + | | align=center | 300 | ||
| + | | align=center | 48/s | ||
| + | | align=center | 110kg | ||
|} | |} | ||
{{br}} | {{br}} | ||
| Line 197: | Line 255: | ||
|- | |- | ||
| align=center | | | align=center | | ||
| + | |} | ||
| + | {|Border=1 class="wikitable" | ||
| + | ! align=center rowspan=2 | [[image:Battery_Light.png]] | ||
| + | ! align=center rowspan=2 width=135 | Hive Fast Charge | ||
| + | ! align=center | Capacity | ||
| + | ! align=center | Charge Rate | ||
| + | ! align=center | Mass | ||
| + | |- | ||
| + | | align=center | 300 | ||
| + | | align=center | 48/s | ||
| + | | align=center | 110kg | ||
|} | |} | ||
===How to Kill=== | ===How to Kill=== | ||
Revision as of 19:46, 3 July 2010
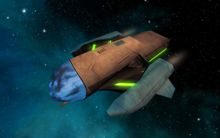
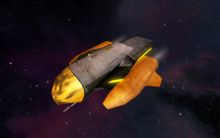
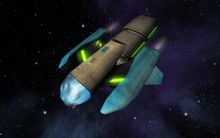
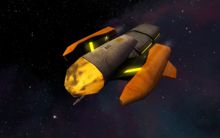
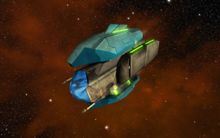
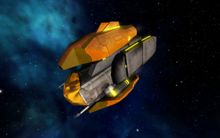
Transports carry around all different sorts of cargo, from common ores to precious minerals. In general, the better the transport, the more lucrative the goods it carries. All transports come equipped with guns, come with escorts, and have heavy armor. The higher end of transports have quite good guns, very good escorts, and very thick armor.
Axia RT29
| Weapon XP | Combat XP | Hull Strength | Mass | Weapon Ports | Max Speed | Turbo Speed | License | ALA |
|---|---|---|---|---|---|---|---|---|
| 20 | _ | 9000 | 100000kg | 1 small | _ m/s | _ m/s | 5/1/0/8/0 | 3 |
| Systems Located In: Itan | ||||||||
| |
Ion Blaster | |
|---|---|---|
| |
Heavy Power Cell | |
|---|---|---|
Seipos T38
| Weapon XP | Combat XP | Hull Strength | Mass | Weapon Ports | Max Speed | Turbo Speed | License | ALA |
|---|---|---|---|---|---|---|---|---|
| 35 | _ | 1300 | 100000kg | 1 small | _ m/s | _ m/s | 4/5/0/2/0 | 3 |
| Systems Located In: Itan | ||||||||
| |
Flechette Cannon MkII | |
|---|---|---|
| |
Hive Fast Charge | Capacity | Charge Rate | Mass |
|---|---|---|---|---|
| 300 | 48/s | 110kg |
Seipos T11
| Weapon XP | Combat XP | Hull Strength | Mass | Weapon Ports | Max Speed | Turbo Speed | License | ALA |
|---|---|---|---|---|---|---|---|---|
| 55 | _ | 18000 | 12000kg | 1 small | _ m/s | _ m/s | 5/1/0/8/0 | _ |
| Systems Located In: Latos, Pherona | ||||||||
| |
Ion Blaster | |
|---|---|---|
| |
Hive Fast Charge | Capacity | Charge Rate | Mass |
|---|---|---|---|---|
| 300 | 48/s | 110kg |
Orion R14
| Weapon XP | Combat XP | Hull Strength | Mass | Weapon Ports | Max Speed | Turbo Speed | License | ALA |
|---|---|---|---|---|---|---|---|---|
| 75 | _ | 24000 | 12000kg | 1 small | _ m/s | _ m/s | 4/5/0/3/0 | _ |
| Systems Located In: Latos, Pherona | ||||||||
| |
Flechette Cannon MkII | |
|---|---|---|
| |
Hive Fast Charge | Capacity | Charge Rate | Mass |
|---|---|---|---|---|
| 300 | 48/s | 110kg |
Aerna
| Weapon XP | Combat XP | Hull Strength | Mass | Weapon Ports | Max Speed | Turbo Speed | License | ALA |
|---|---|---|---|---|---|---|---|---|
| 150 | _ | 17000 | 14000kg | 1 small | _ m/s | _ m/s | 5/1/0/8/0 | _ |
| Systems Located In: Sedina | ||||||||
| |
Positron Blaster x2 | |
|---|---|---|
| |
Hive Fast Charge | Capacity | Charge Rate | Mass |
|---|---|---|---|---|
| 300 | 48/s | 110kg |
Milanar
| Weapon XP | Combat XP | Hull Strength | Mass | Weapon Ports | Max Speed | Turbo Speed | License | ALA |
|---|---|---|---|---|---|---|---|---|
| 180 | _ | 26000 | 100000kg | 2 small | _ m/s | _ m/s | 4/5/0/4/0 | 3 |
| Systems Located In: Sedina | ||||||||
| |
Positron Blaster x2 | |
|---|---|---|
| |
Hive Fast Charge | Capacity | Charge Rate | Mass |
|---|---|---|---|---|
| 300 | 48/s | 110kg |
How to Kill
Big and slow, mounts dual positrons. You won't find one without escorts, unless someone already killed the escorts. A simple attack roll works fine, though it takes a long time.
Bots | |
|---|---|
| Military | Station Guards · Strike Force · Aerna Seeker · Station Defense Turrets |
| Hive | Observers · Collector drones · Guardian drones · Assault drones · Transport drones · Overseers · Hive Queen · Leviathan |
| Other | NPC Traders · GuideBots |
| Historical | Frigate |
